A lift kit raises a golf cart’s ride height so it can fit larger tires and clear rougher ground. Most kits come in a few parts: front spindles or A-arms, rear springs or blocks, and the hardware to join them. The job is within reach of a first-timer who has a helper, a level floor and a patient pace. Plan on two days: one for prep and installation, one for checks and a test drive. Learning how to install a golf cart lift kit mostly means doing the steps in the right order and knowing when a problem is bigger than your tools.
Your kit’s instructions always outrank a general guide. Where this article and the instruction sheet disagree, follow the sheet.
Before You Buy: Matching a Lift Kit to Your Cart’s Make, Model and Year
A lift kit is built for a specific suspension. Manufacturers change frames, axles and steering parts between model years, so a kit that fits one year of a cart may not fit the next. Confirm three things before you order: the make, the exact model, and the model year.
Find the serial number plate or sticker on your cart. Its location differs by manufacturer, so check your owner’s manual. The serial number usually tells you the production year, and you can compare it against the kit’s listed fitment.
Also note whether the cart is gas or electric, and whether it has a standard or heavy-duty rear axle if the listing asks. Some kits differ by these details.
When the kit arrives, open it and check every part against the parts list before you start. A missing bolt on Saturday morning is much easier to deal with if you find it on Wednesday. Read the whole instruction sheet once, start to finish, so nothing surprises you halfway through.
The Tools and Workspace You Need Before You Touch a Bolt
Most lift kits go on with ordinary hand tools. Gather these ahead of time:
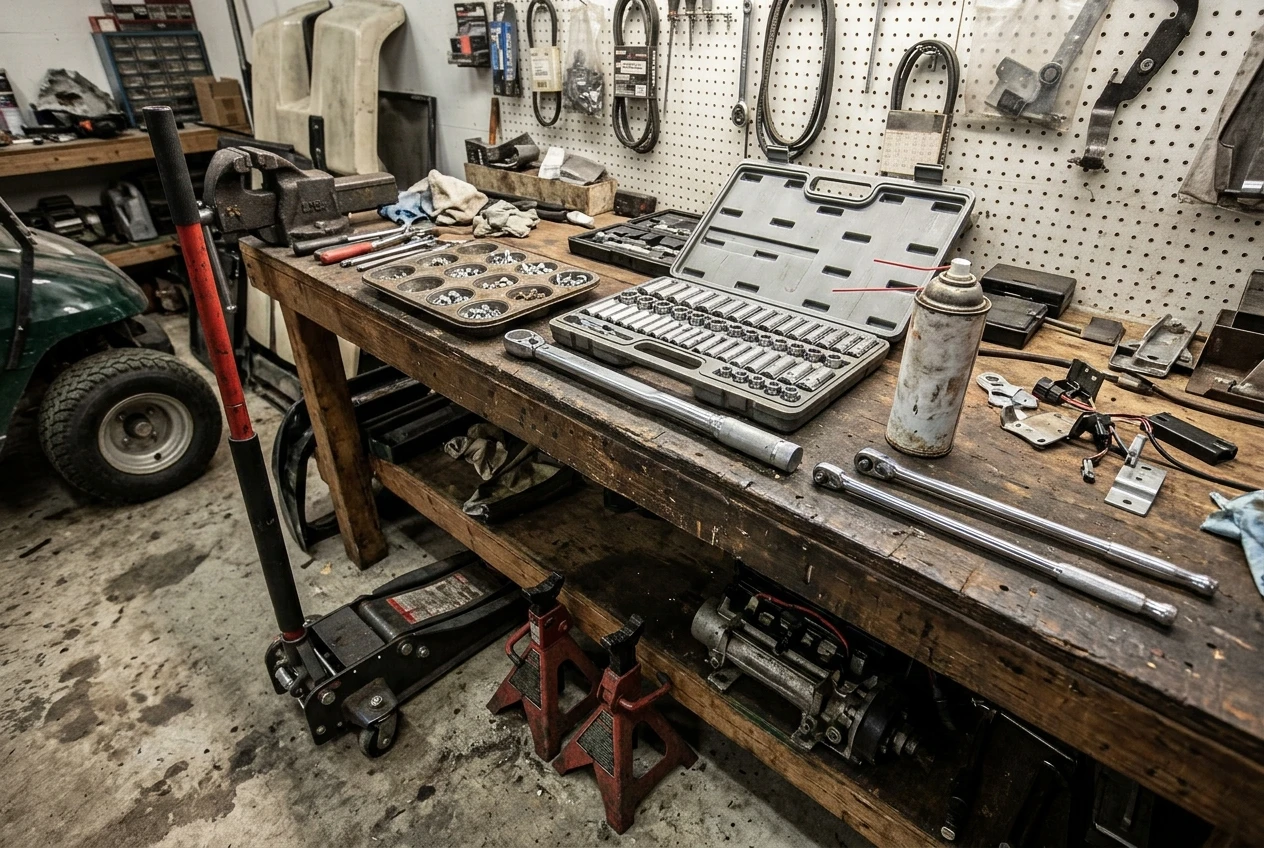
- A floor jack and at least two jack stands rated well above the weight of your cart
- Wheel chocks
- A socket and wrench set in the sizes your cart and kit use (your cart may need metric, SAE or both)
- A breaker bar for stubborn fasteners
- A torque wrench that covers the range the kit’s instructions list
- Penetrating oil for rusted bolts
- A pry bar and a rubber mallet
- Grease for any fittings or bushings the instructions mention
- Safety glasses and work gloves
- A phone for photos, plus labeled bags or a muffin tin for hardware
The workspace matters as much as the tools. Use a flat, hard surface such as a concrete garage floor. Soft ground and slopes let a jack or stand shift. You want enough room to walk around the cart, good light, and space to lay out parts in the order you remove them.
Ask someone to help. A second person steadies a spindle while you thread a bolt, and can call for help if something goes wrong.
Getting the Cart Off the Ground Safely
Do all the safety steps before you remove any parts. A cart that moves or drops while you are under it is the one serious danger in this job.
- Park on level concrete, turn the key off and remove it.
- Disconnect the battery. On an electric cart, switch to the tow or maintenance setting if your manual calls for it and disconnect the main negative lead. On a gas cart, disconnect the battery as well.
- Chock the wheels that will stay on the ground and set the parking brake.
- Loosen the lug nuts a quarter turn while the tire is still on the ground, so the wheel does not spin when you break them free.
- Lift only at the frame points shown in your owner’s manual. Never lift on plastic body panels or on suspension parts that you are about to remove.
- Set jack stands under solid frame points and lower the cart onto them. A jack is for lifting; the stands hold the weight.
- Push firmly on the cart to check that it does not rock on the stands.
Work one end at a time. Lift and support the front, finish the front components, then repeat the process at the rear. Keep the end you are not working on chocked on the ground.
Removing the Old Parts and Mounting the Lift Kit Components
Take photos of everything before and as you disassemble. Pictures of how a bracket, washer or cable sits will save time at reassembly. Bag and label hardware by location, such as “front left spindle.”
Front suspension
On many carts, the front lift involves replacing the spindles or the upper arms with taller ones. The general sequence is:
- Remove the front wheels.
- Detach the brake components from the spindle if your cart has them there, and support them rather than letting them hang by the cable or line.
- Disconnect the tie rod end from the spindle. A mallet or a puller may free a stuck joint.
- Support the spindle or arm, remove its mounting bolts, and take it out.
- Fit the new part in the same orientation and attach it with the hardware from the kit.
- Reattach the steering and brake parts to the new spindle.
Do one side completely before starting the other. The untouched side serves as a visual reference.
Rear suspension
Rear lifts usually add taller or extended leaf springs, spring blocks or longer shackles, depending on the kit. Support the rear axle with a jack or stands so it cannot drop when the springs come loose. Remove the shocks if the kit replaces them, then loosen the U-bolts and spring hardware. Install the new components in the order the instructions give, and make sure the axle sits square on the spring perches before you tighten anything.
Snug first, final torque later
Thread all fasteners in and snug them, but leave the final tightening until the instructions say to do it. Bolts that go through rubber bushings are often tightened with the cart’s weight on the wheels so the bushings are not twisted in a position they will not hold at ride height. Your kit sheet will say which bolts this applies to.
If the lift changes the distance brake cables or lines have to travel, the kit may include longer ones. Install those parts if provided. Never reuse a cable that is stretched tight.
Torque, Alignment and Brake Checks Before the First Drive
Skipping this section is how a clean installation turns into a roadside repair. Lower the cart to the ground and go through the following checks before you drive it anywhere.
Torque everything to spec. Use the torque wrench and the values in the kit instructions and your cart’s service manual. Do not guess by feel. Torque the lug nuts in a crisscross pattern. Mark each fastener with a paint pen after tightening so a loose one is easy to spot later.
Check steering and alignment. Center the steering wheel and confirm the front wheels point straight ahead. Lifts change the front-end geometry, so measure toe-in with a tape measure at the front and rear of the tires, and compare it with the setting in your service manual or kit instructions. Adjust the tie rods as needed.
Test the brakes before moving. Press the pedal and check that it feels firm and that both rear wheels respond. Look at cable routing for kinks and pinch points. Check that brake cables have the slack they need through the full range of suspension travel.
Check clearances. Turn the steering fully both ways and look for tires rubbing against the body, frame or suspension parts. Bounce each corner and watch for any cable or wire that stretches.
Do a slow test drive. Reconnect the battery and drive slowly in a clear area. Listen for clunks. Brake gently, then a bit harder. Steer through both full locks. Then stop, and recheck the torque on suspension and wheel fasteners. Check again after your first few real trips, since fasteners can settle as parts seat.
Mistakes First-Timers Make and When to Hand It to a Shop
The same errors come up on first installs:
- Ordering a kit on a guess about the model year
- Working under a cart supported only by a jack
- Tightening bolts fully before the cart’s weight is on the suspension
- Forgetting to reconnect or reroute brake cables
- Mixing up left and right parts, or reversing a bracket
- Skipping the alignment check because the cart “looks straight”
- Not rechecking torque after the first drive
Some situations mean you should stop and call a shop. A lift kit is not always an easy bolt-on, and a stuck job is not a failure.
- Seized or stripped fasteners that penetrating oil and a breaker bar do not free
- Bent or cracked parts you find on the old suspension, such as a bent spindle or a worn steering joint
- Instructions that do not match your cart, with brackets that do not line up or holes that are missing
- Required cutting, drilling or welding that the kit does not normally call for
- Brakes that feel soft or uneven after assembly and adjustment
- No level surface, no stands, or no helper when the job calls for them
A shop can also do the final alignment if you finish the install but lack the tools to measure toe-in accurately. Paying for that one step is better than driving a cart that wanders.
Planning What Comes Next: Tires, Wheels and Battery Load After a Lift
A lift changes more than the stance of the cart. Several other parts of your build are affected.
Tires and wheels. The main reason to lift a cart is to fit larger tires. Check the kit’s stated tire size range before you buy tires, and confirm the wheel offset so the tire clears the suspension and body. Larger tires change the effective gearing: the cart may feel slower to accelerate, and the speedometer and any speed controller settings may read differently. Some carts need a controller adjustment or a different gear ratio to compensate. Check your cart’s documentation before you change tire diameter.
Battery load. Heavier tires and a taller cart usually mean more work for the motor, which draws more from the batteries and can shorten range. If you already feel range pressure, a battery upgrade is worth planning alongside the lift. Our guide to choosing the right battery upgrade for longer golf cart range covers the options.
Electrical and accessories. A lifted cart often gets lights, a sound system or other accessories at the same time. Each one adds to the electrical load, so add them with that load in mind. Our piece on whether LED light kits drain golf cart batteries faster explains what to expect from lighting.
Handling. A higher center of gravity changes how the cart feels in turns and on slopes. Drive cautiously on the first outings and take corners slower than you did before the lift. Check wiring and cable lengths after you install accessories, because a higher body can pull on cables that were routed for the stock height.
Ready to Start Your Lift Project?
Browse the lift kits and install accessories in the shop, and check the fit guide for your cart’s make and model before you order.